Vue Router
Vue Router 是 Vue.js 官⽅的路由管理器
Vue Router知识点回顾
核⼼步骤:
Vue Router源码实现
根据以上的核心步骤,尝试简单实现一个自己的Vue Router
源码链接
需求分析
首先基于以上步骤,对需要实现的功能进行解构:
- Vue Router是以Vue插件形式存在;
- url变化页面不刷新,内容变化;
- 实现两个全局组件router-link 和router-view;
- 数据响应式,url变化内容重新渲染,不需要额外dom操作;
- 路由嵌套;
然后将需求拆解为具体的任务:
- 实现⼀个插件
- 实现VueRouter类
- 处理路由选项
- 监控url变化,hashchange
- 响应这个变化
- 实现install⽅法
实现过程
实现插件:创建VueRouter类和install方法
根据Vue官方文档,Vue.js的插件应该暴露一个 install 方法。这个方法的第一个参数是 Vue 构造器,第二个参数是一个可选的选项对象。
因此,只需暴露一个具有install方法的VueRouter类即可。
创建yvue-router.js
1
2
3
4
5
6
7
8
9
10
11
12
13
14
15
16
17
18
19
20
21
22
23
24
25
26
27
28
29
| let Vue;
class VueRouter {
constructor(options) {
this.options = options;
}
}
VueRouter.install = function (_Vue) {
Vue = _Vue;
Vue.mixin({
beforeCreate() {
if (this.$options.router) {
Vue.prototype.$router = this.$options.router;
}
}
});
Vue.component('router-link', Link)
Vue.component('router-view', View)
};
export default VueRouter;
|
yvue-router/index.js
1
2
3
4
5
6
7
8
9
10
11
12
13
14
15
16
17
18
19
20
21
22
23
24
25
26
27
| import Vue from "vue";
import VueRouter from './yvue-router'
Vue.use(VueRouter)
const routes = [
{
path: '/',
name: 'Home',
component: Home
},
{
path: '/about',
name: 'About',
component: () => import( '../views/About.vue')
}
]
const router = new VueRouter(
{
routes
}
)
export default router
|
main.js
1
2
3
4
5
6
7
8
9
10
11
| import Vue from 'vue'
import App from './App.vue'
import router from './yvue-router'
Vue.config.productionTip = false
new Vue({
router,
render: h => h(App)
}).$mount('#app')
|
为什么要单独保存install函数中传递的Vue构造函数:
相当于引用,将来打包时不会将vue打包
为什么要使用mixin:
因为use在前,Router实例创建在后,⽽install逻辑⼜需要⽤到该实例。
因此将创建的Router实例在new Vue时传入,这样就能在mixin中利用生命周期钩子,在组件创建前将实例注册到全局($router)
创建router-view和router-link
components/link.js
1
2
3
4
5
6
7
8
9
10
11
12
13
14
15
16
| export default {
props: {
to: String,
required: true
},
render(h) {
return h('a', {
attrs: {
href: '#' + this.to
}
}, [
this.$slots.default
])
}
}
|
components/view.js
1
2
3
4
5
6
| export default {
render(h) {
return h(null);
}
}
|
- 为什么不能用template:VueCli的环境下的vue版本是runtimeonly,没有编译器
- 为什么不用jsx:兼容性不太好
监控url变化
定义响应式的current属性,监听hashchange事件
1
2
3
4
5
6
7
8
9
10
11
12
13
14
| class VueRouter {
constructor(options) {
const initial = window.location.hash.slice(1) || '/'
Vue.util.defineReactive(this, 'current', initial)
window.addEventListener('hashchange', this.onHashChange.bind(this))
window.addEventListener('load', this.onHashChange.bind(this))
}
onHashChange() {
this.current = window.location.hash.slice(1)
}
}
|
动态获取对应组件, view.js
1
2
3
4
5
6
7
8
9
10
| export default {
render(h) {
let component = null;
const route = this.$router.$options.routes.find(route => route.path ===
this.$router.current)
if(route) component = route.component
return h(component);
}
}
|
- 如何实现url的响应式?
- 方式1:借鸡生蛋 new Vue({data})
- 方式2: Vue.util.defineReactive(obj,’current’),这是Vue构造函数中提供的一个方法
实现嵌套路由
在实现了简单的路由切换后,尝试实现嵌套路由。
首先在创建路由实例时加入了如下配置:
1
2
3
4
5
6
7
8
9
10
11
12
13
14
15
16
17
| {
path: '/about',
name: 'About',
component: () => import( '../views/About.vue'),
children: [
{
path: '/about/child1',
name: 'child1',
component: () => import( '../components/Child1.vue'),
},
{
path: '/about/child2',
name: 'child2',
component: () => import( '../components/Child2.vue'),
}
]
}
|
然后在About组件中,也加入了相应的router-link及router-view。运行时却发现陷入了死循环:
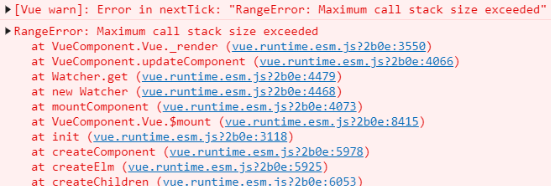
原因在于:router-view渲染了About组件后,发现About组件里也有router-view组件,因此就不断地渲染About组件,陷入死循环。
那么该如何解决这个问题?
查看VueRouter源码后发现,router-view在渲染前进行了如下操作:
- 标记当前
router-view的深度
- 递归遍历routes选项,将匹配的route存入一个数组中,再通过当前的深度获取对应的component
参考这个思路,简单实现了路由的嵌套:
1
2
3
4
5
6
7
8
9
10
11
12
13
14
15
16
17
18
19
20
21
22
23
24
25
26
27
28
29
30
31
32
33
34
35
36
37
38
39
| class VueRouter {
constructor(options) {
Vue.util.defineReactive(this,'current',this.getHash());
Vue.util.defineReactive(this, 'matched', [])
this.match()
}
getHash() {
return window.location.hash.slice(1) || "/"
}
onHashchange() {
this.current = this.getHash()
this.matched = []
this.match()
}
match(routes) {
routes = routes || this.options.routes
for (const route of routes) {
const {path} = route
const {current} = this
if (path === '/' && current === '/') {
this.matched.push(route)
return
}
if (path !== '/' && current.indexOf(path) > -1) {
this.matched.push(route)
if (route.children && route.children.length > 0) {
this.match(route.children)
}
return
}
}
}
}
|
view.js
1
2
3
4
5
6
7
8
9
10
11
12
13
14
15
16
17
18
19
20
21
22
23
24
25
26
| export default {
render(h) {
this.$vnode.data.routerView = true
let depth = 0;
let parent = this.$parent
while (parent) {
const vnodeData = parent.$vnode && parent.$vnode.data
if (vnodeData && vnodeData.routerView) {
depth++;
}
parent = parent.$parent
}
let component = null
const route = this.$router.matched[depth]
if (route) {
component = route.component
}
return h(component)
}
}
|
