
前言
历时将近一个月的时间,Vue3造轮子的项目暂时完结,果然不断实践不断踩坑才是巩固新知识的最好方法,对Vue3算是有了一个整体的把握。把官网部署上线之后成就感也是满满的哈哈哈。所以先对这个项目进行一个整体的回顾~
技术细节
- 使用
Vue3+TypeScript开发组件,基本运用了Vue3的新特性 - 使用
Vue3+Vue Router制作官网,官网支持代码的预览和展示,并进行了移动端适配 - 使用
marked实现官网对Markdown文件的支持 - 使用
prism.js实现代码的高亮展示 - 使用
Vite进行项目的搭建、开发和部署 - 手动编写 shell 自动化部署脚本
- 使用
Rollup打包库文件,并发布到 npm
成果展示
项目回顾
项目搭建
项目采用vite来搭建项目
什么是vite
vite是一个由原生 ESM 驱动的Web开发构建工具。在开发环境下基于浏览器原生ES imports开发,在生产环境下基于Rollup打包vite的特点
- 快速的冷启动:不需要等待打包操作;即时的热模块更新
- 替换性能和模块数量的解耦让更新飞起;
- 真正的按需编译:不再等待整个应用编译完成
创建项目
1
2
3
4
5
6
# 安装脚手架工具
yarn global add create-vite-app@1.18.0
# 创建并进入工程目录
mkdir xing-ui-v3 && cd xing-ui-v3
# 创建项目目录
cva xing-ui-v3项目主要目录结构
1
2
3
4
5
6
7
8
9
10
11
12
13
14
15
├── index.html
├── vite.config.ts # vite配置文件
├── public # 该项目静态资源
├── plugins # 该项目所使用插件
└── src
├── assets
| └── css # 公共css文件
├── components # 制作官网需要的组件
├── lib # 需导出的UI组件库
├── markdown # 官网展示所需md文件
├── router # 路由
├── views # 官网页面逻辑
├── App.vue
├── main.ts
└── index.scss
组件开发
组件开发思路
每个组件的开发基本遵循的开发思路为:

需求分析:明确每个组件需要实现的功能,交互方式,设计基本样式和API
逻辑实现:将功能上的逻辑走通,下文会详细叙述每个组件开发过程中运用到的
Vue3新特性、遇到的问题及解决过程完善css样式:为方便后期维护,将组件库的公共scss变量以及各个组件的scss变量存放到公共的scss文件中
*注:在该项目的开发中,尝试配置全局的scss文件失败,后续会继续尝试优化
优化测试:优化代码,测试功能是否正常运行,后续会添加每个组件的单元测试,以及实现持续集成测试
注:该UI框架的开发是以学习Vue3为主要目的,因此每个组件都只实现了部分基础功能,并不能满足实际项目开发需要;组件的功能和样式参考了主流的UI框架
Switch 开关

Button 按钮

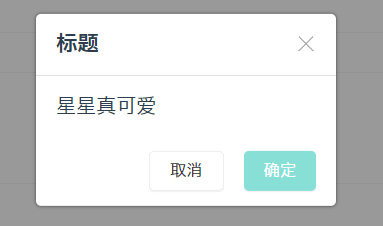
Dialog 对话框
Tabs 标签页
完善官网
支持引入markdown文件
安装
marked1
yarn add --dev marked
配置
md.ts(自制vite插件)1
2
3
4
5
6
7
8
9
10
11
12
13
14
15
16
17
18
19
20
21
22
23
24
25
26
27
28
29
30
31
32// @ts-nocheck
import path from 'path'
import fs from 'fs'
import marked from 'marked'
const mdToJs = str => {
const content = JSON.stringify(marked(str))
return `export default ${content}`
}
export function md() {
return {
configureServer: [ // 用于开发
async ({ app }) => {
app.use(async (ctx, next) => { // koa
if (ctx.path.endsWith('.md')) { // 如果文件时以.md结尾,就转译为js(因为浏览器只支持js)
ctx.type = 'js'
const filePath = path.join(process.cwd(), ctx.path)
ctx.body = mdToJs(fs.readFileSync(filePath).toString())
} else {
await next()
}
})
},
],
transforms: [{ // 用于 rollup // 插件
test: context => context.path.endsWith('.md'),
transform: ({ code }) => mdToJs(code)
}]
}
}创建
vite.config.ts1
2
3
4
5
6
7
8// @ts-nocheck
import { md } from "./plugins/md"
export default {
plugins: [md()] // 使用md插件
}使用示例
1
<article v-mtml="md"></article>
1
2
3
4
5
6
7
8
9
10
11
12
13import md from '../markdown/attr-button.md'
import {ref} from 'vue'
export default {
setup () {
const md = ref<string>('')
md.value = md
return {
md
}
}
</script>
代码高亮展示
为什么使用
prism.js?在Vue2造轮子的项目中,我使用了
highlight.js进行代码高亮,于是这个项目我也先尝试使用了这个库。然而,引入后,运行时会报错
Uncaught ReferenceError: require is not defined。google后了解到,
vite使用的是浏览器自带的module去解析js的,而require语法是node语法,因此不支持使用require方式来导入模块。然后查看了一下
highlight.js的源代码,发现其入口文件是这样的:1
2
3var hljs = require('./core');
/* --- */
module.exports = hljs;于是只能采用方应杭老师的建议,使用
prism.js。如何引入
查看
prism.js的源代码,发现有这么一段1
2
3
4if (typeof global !== 'undefined') {
global.Prism = Prism;
}指其声明了一个全局变量
Prism,因此可以这样引入1
2
3
4
5
6
7
8
9<template>
<pre class="language-html" v-html="Prism.highlight(code, Prism.languages.html, type)" />
</template>
<script lang="ts">
import 'prismjs';
const Prism = (window as any).Prism
</script>封装代码高亮组件
1
2
3
4
5
6
7
8
9
10
11
12
13
14
15
16
17
18
19
20
21
22
23
24
25
26
27
28
29
30
31
32
33<template>
<pre class="language-html" v-html="Prism.highlight(code, Prism.languages.html, type)" />
</template>
<script lang="ts">
import 'prismjs';
const Prism = (window as any).Prism
export default {
name: 'pre-code',
props: {
code: {
type: String,
default: ''
},
type: {
type: String,
default: 'html'
}
},
setup(){
return {
Prism
}
}
}
</script>
<style lang="scss">
@import '../../assets/css/prism.css';
</style>封装代码展示组件
效果:

打包部署
在vite.config.ts中配置build path
1
2
3
4
5export default {
base: './',
assetsDir: 'assets',
}编写一键部署脚本
项目根目录添加
deploy.sh1
2
3
4
5
6
7
8
9
10
11rm -rf dist &&
yarn build &&
cd dist &&
git init &&
git add . &&
git commit -m "update" &&
git branch -M master &&
git remote add origin git@github.com:wuyangqin/xing-ui-v3-dist.git &&
git push -f -u origin master &&
cd -
echo https://wuyangqin.github.io/xing-ui-v3-dist/#/
发布至npm
rollup 编译库文件
在
lib目录新建index.ts导出需导出的文件1
2
3
4
5
6
7
8export { default as XSwitch } from './Switch.vue'
export { default as XButton } from './Button.vue'
export { default as XTabs } from './tabs/tabs.vue'
export { default as XTab } from './tabs/tab.vue'
export { default as XDialog } from './Dialog.vue'
export { default as XIcon } from './Icon.vue'
export { openDialog as openDialog } from './plugin/openDialog'配置
rollup.config.js1
2
3
4
5
6
7
8
9
10
11
12
13
14
15
16
17
18
19
20
21
22
23
24
25
26
27
28
29
30import esbuild from 'rollup-plugin-esbuild' // 把ts变成js
import vue from 'rollup-plugin-vue' // 把vue结尾的文件变成js
import scss from 'rollup-plugin-scss' // 把scss结尾的变成js
import dartSass from 'sass'; // 用来支持rollup-plugin-scss插件
import { terser } from "rollup-plugin-terser" // 把js代码变得别人看不懂
export default {
input: 'src/lib/index.ts',
output: {
globals: { // 用到了外部依赖Vue
vue: 'Vue'
},
name: 'xing-ui-v3',
file: 'dist/lib/xing-ui-v3.js',
format: 'umd',
plugins: [terser()]
},
plugins: [
scss({ include: /\.scss$/, sass: dartSass }),
esbuild({
include: /\.[jt]s$/,
minify: process.env.NODE_ENV === 'production',
target: 'es2015'
}),
vue({
include: /\.vue$/,
})
],
}使用rollup打包
1
rollup -c
发布至npm
配置package.json
1
2
3
4
5
6
7
8
9{
"name": "xing-ui-v3",
"version": "0.0.1",
"files": [
"dist/lib/*" // 发布dist/lib下的所有文件
],
"main": "dist/lib/xing-ui-v3.js"
}发布
1
2
npm login
npm publish
Xing-UI Vue2版
在Vue3版本的UI库实现之前,还实现了Vue2版本,对应的官网和源码链接如下:
后期规划
- 添加图标库
- 添加单元测试
- 组件库持续更新